

Putting your own sound into Instagram Reels gives your videos a special touch that sets them apart from others. Who wouldn’t want to use this to grow their account?
In this guide, we’ll show you how to make original audio on Instagram and add it to your Reels. Let’s make your content pop!
Can You Upload Custom Audio to Instagram?
Yes. Basically, you have options when recording a Reel on Instagram: use your own unique audio, use original audio by another creator, or pick from Instagram’s library using the Audio tool.
Original audio on Instagram holds a unique charm. Plus, using it's also great for promoting your account. When someone includes the audio in their Reel, your username gets highlighted. If your account is public, anyone on Instagram can use it in their Reels. But bear in mind that if your account is private, that’s not possible.
How to Create Original Audio on Instagram
It all starts with a straightforward recording. You have two options:
- Record yourself using your phone’s camera or Instagram’s camera, and then upload the audio from that video (we’ll explain how to upload it later).
- Directly make an audio recording to use in your Reel.
If you gravitate to the second plan, most smartphones come equipped with a built-in app for recording:
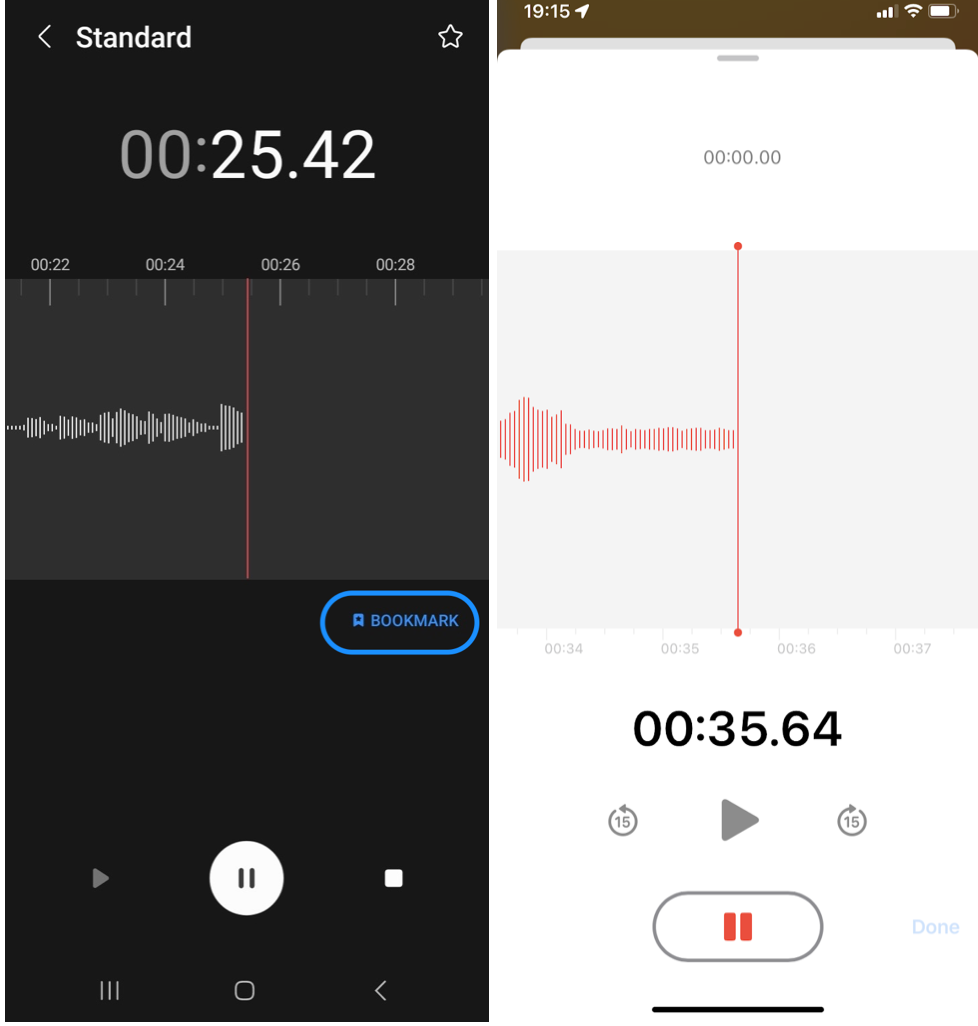
- Open the Voice Recorder/Voice Memo app on your phone. If you don’t see it, you can download it from the app store.
- For Android: Choose your preferred recording mode like Standard, Interview, or Speech-to-text. Adjust settings like recording quality and call blocking if needed.
- Press the red Record button to start recording and the Pause button to pause.
- Use the Bookmark button to mark important parts of your recording.
- Name and save your recording once you’re done.
- You can edit the recording by cutting out unwanted parts.
- Save your edited file.
These steps should work for most phones, although the names of options may vary slightly depending on your device. But why stop there? Let’s make it even cleaner and crisper.
Pro mode: improving your audio
If you’ve got an audio or video with fantastic potential but it comes with background noise or unwanted music, you can refine it before uploading it to Instagram. One tool you can use is LALAL.AI, an advanced audio separation tool:
- Go to the LALAL.AI website in your browser.
- Click on Select File to choose the audio or video file you want to work with.
- Wait a few seconds for the processing to complete.
- If you want to isolate a specific instrument like drums, bass, or piano, select the corresponding stem.
- Click the play icon in the Instrumental [Preview] section to listen to the separated track.
- If you’re satisfied with the preview, click Process the Entire Track.
- If you’re logged in, you’ll get 10 minutes of free splitting. If not, you’ll be prompted to log in with your email.
- After processing, download your original track from the link sent to your email.
How to Add Your Own Audio to Instagram Reels
You can add audio to your Reel in two ways: either upload audio from a video in your camera roll (Instagram will keep the sound only) or use third-party apps for your audio tracks (which works better if you only have the recording).
Let’s first look at how to do it using Instagram’s own tools:
- Open Instagram on your phone.
- Tap the + button to start creating a new post, and choose Reel from the options.
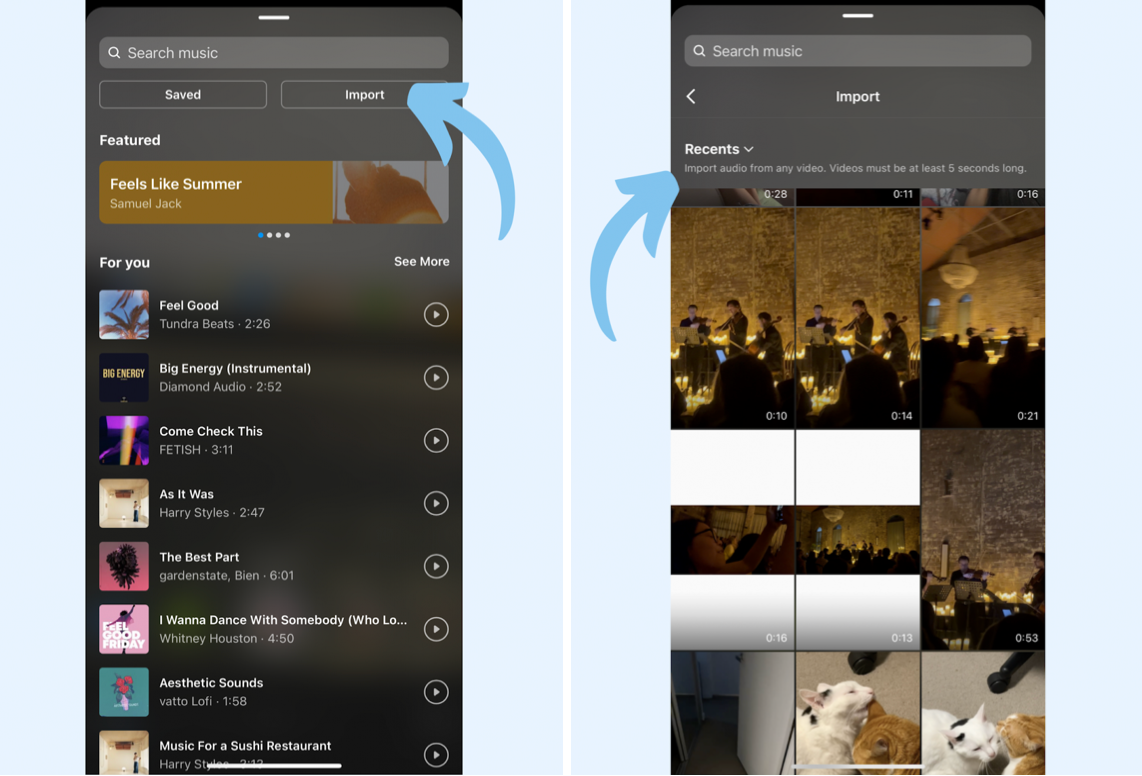
- On the left side of the screen, select Audio and then tap on Import.
- Choose the video you want to import audio from.
- Trim the audio if you want and tap Done
- Upload or record your own video on top of it and tap Add.
For the second option, using third-party apps, you’ll need both your audio and video pre-recorded. Now, for iOS users, a native app you can use is iMovie:
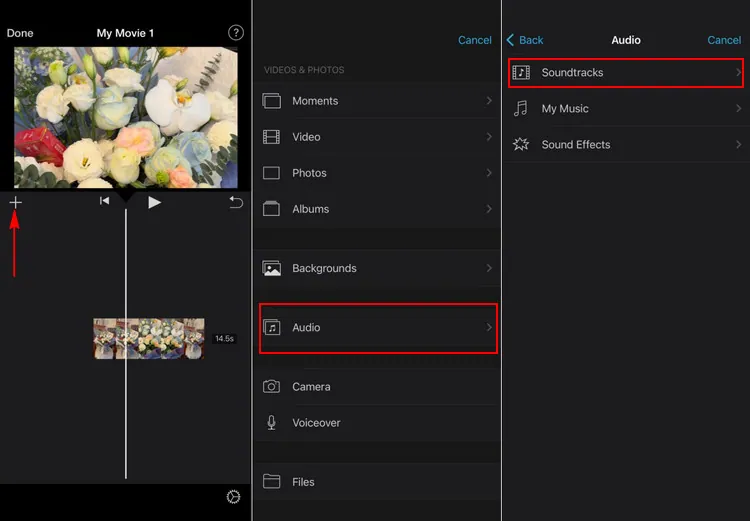
- Open iMovie and load your video project.
- Click Audio and select Soundtracks
- Drag the chosen audio into the timeline.
- If you have more audio, drag it into the track to play throughout the video or under specific clips for targeted audio.
You can also use Splice, which is available for iOS and Android users:

- Open Splice and start a new project.
- Select a video from your camera roll.
- Name your project and choose the screen size.
- Add audio and adjust it in the timeline.
- Trim or reposition using sliding arrows and save.
No matter which app you use, post your Reel as usual by uploading the video with custom audio. A tip: repeat the first step-by-step in this section to make it shareable — upload the video with just the audio first, then upload the same video again on top of it.
How to Add Original Audio to Instagram Story
Before recording your Story, you should save your custom audio in your sounds library. If you haven’t done it, follow the instructions above to upload your Reel. Once uploaded, click on the name of the audio at the bottom of the screen, and near the top of the page, you’ll see a bar that says Save Audio.
Now, here’s how to add the sound to a Story:
- Add or record the video.
- Choose the Music sticker.
- Access your audio in Saved and tap it.
It will be added to your Story automatically.
Word of Caution: Using Copyrighted Music
Be careful when using copyrighted music in Reels. If you want to use music that isn’t in Instagram’s library, you need to get a license for it beforehand. Unfortunately, this process can be complicated and expensive for personal users.
According to Instagram’s rules, all licensed music must be properly attributed to the artist and include the track’s name. If you upload licensed music and claim it as original, Instagram will change the description to credit the artist and song title.
If music agreements change, your post’s audio might be muted, but your post will still be visible. Overall, on an Instagram Reel, original audio and music are the safest choices to avoid any trouble.
What If My Audio Gets Muted?
If your audio is muted, you’ll receive a notification to change the audio when you watch it. You can replace the muted audio with another audio, but you can only do this once. Here’s how:
- From the muted Reel, tap Replace audio.
- Choose the audio you want to use.
- Select the part of the audio you want for your Reel, tap Done in the top right corner.
- Tap Done again to confirm.
If you can’t find the audio editing option, save the Reel to your phone’s camera roll, delete it from Instagram, and then upload it again. However, note that this will reset your view counts and insights.
How to Use Others’ Audio in Your Reels
Often, when you’re scrolling through other people’s Reels, you find an awesome audio clip that you want to use in your own videos. Here’s how you can do it:
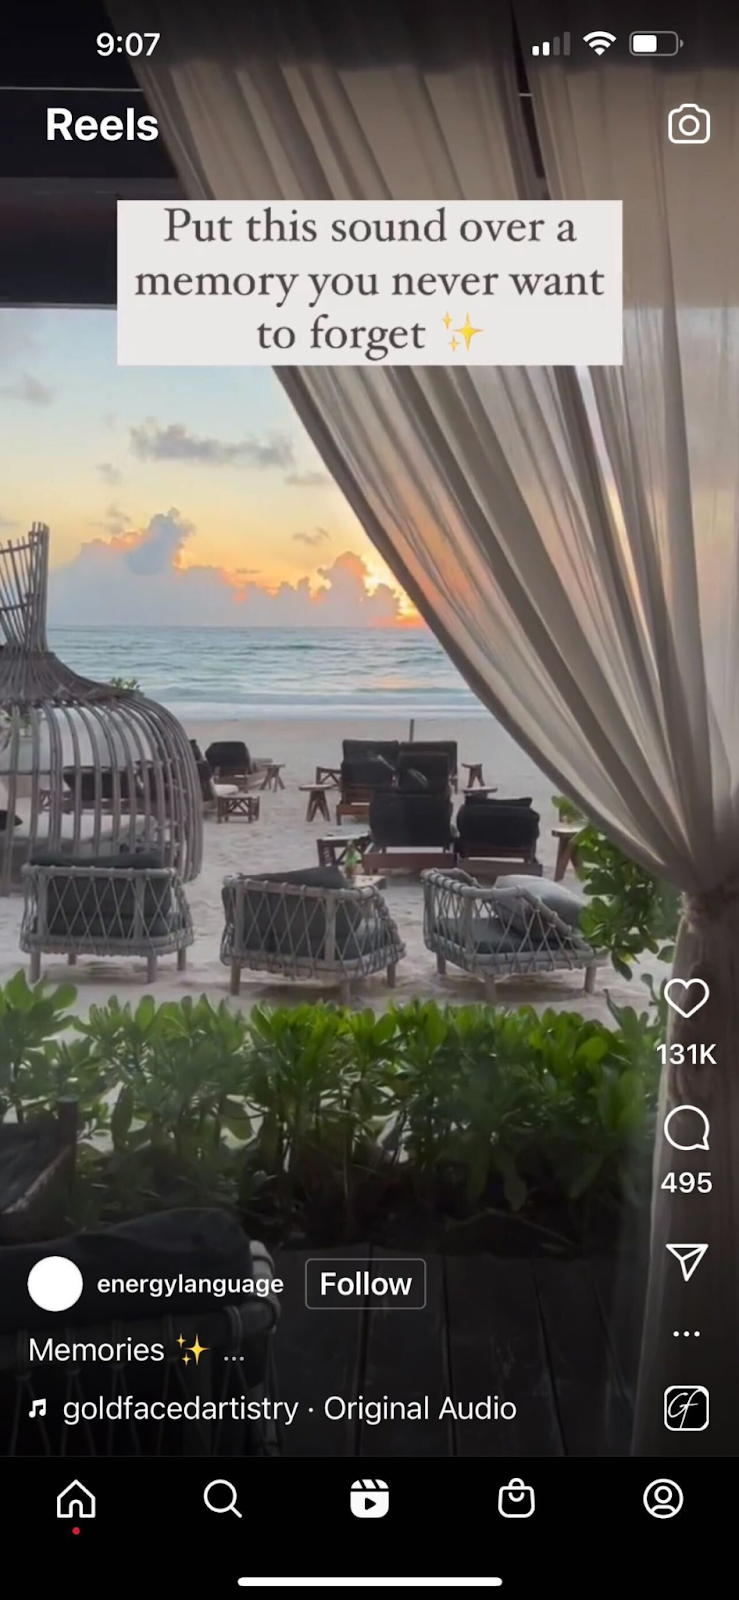
- Find the Reel with the original audio you like and tap on it.
- Tap on the original audio that’s playing and select Save Audio, which will add it to your music collection.
- Open Reels, tap on the Music icon, and go to Saved.
- Select the audio you saved, tap Done, and it will be added to your new Reel.
Tips for Custom Audio to Go Viral
Keep it short
Shorter videos perform better because more people watch them all the way through. This signals to Instagram that your content is valuable and boosts its reach and visibility. Plus, shorter trends are easier for others to copy.
Create sounds that are super easy to follow
Skip fancy edits and keep it simple. The easier it is for others to use your sound, the more likely it’ll catch on. Bonus if people don’t have to show their face because many struggle with being on camera.
Give your audio a clear and memorable name
This helps people find it easily in their saved list and share it with others. When you’re about to post, look for the option to rename your audio on the same screen where you add captions. Without a distinctive name, it’ll be labeled as Original Audio and blend in with others’ content.
Create an eye-catching cover
This makes your sound noticeable on your profile and the audio page. People who notice your trend will return to your profile later to find the original Reel.
Connect with a wide range of people and situations
Whether it’s universally relatable or specific to your niche, this versatility increases the chances of it becoming popular. For example, people enjoy discussing topics like favorites, likes, dislikes, and personal experiences. So, incorporating these can make your audio appealing to a larger audience.
Don’t mix any background songs
If you use Instagram’s library song, people will use that instead of your voice. Stick to using just your voice, sound effects from editing apps, or your own music to be safe.
Ask people on Instagram to use your audio
Use clear calls to action in your captions, encourage sharing to Stories, and add it to your pinned posts. Plus, everytime you reuse your own audios, more people hear about it and join the trend.
Hopefully, you found these tutorials and tips helpful. Take advantage of potential viral opportunities and think creatively with your sounds. Don’t be afraid to step outside the box with different audio elements!


